
How I make my handmade, unique multi-coloured pom poms
Easy pom pom making has seriously reduced the amount of time it takes to make a pom. Long gone are the days of cutting out two circular pieces of card, with a hole in the middle! These little pom pom machines have opened a whole world of crafting, where lots of poms can be quickly made for large projects like rugs, cushion covers and lampshades. The secret to good poms is all about tying them tightly and giving them a good trim, without trimming them to a smaller size!


My poms are made from multi-coloured mixed-weight yarns, and so do not have the smooth finish of poms made with yarn of the same weight.
To make dense poms, wrap the yarn until the maker will only just close.
For shaggy poms, wrap the yarn until the maker easily closes completely.
Using sharp-pointed scissors to cut the pom.
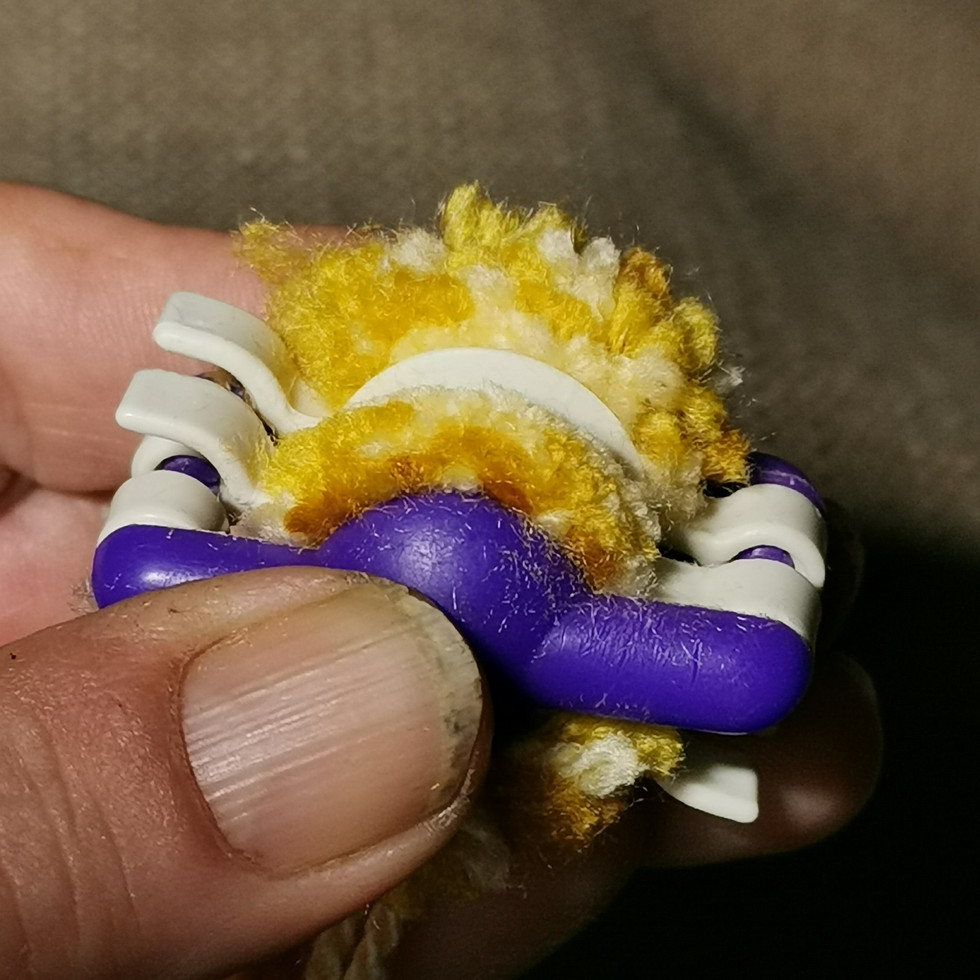
Work from the hinge end of the maker so the other end can be pinched closed. Nothing worse than the pom maker opening, mid-cut!
Double check every thread has been cut or the pom will not be released from the maker and some of the threads could be pulled out.
If the pom is to be dense, ensure the maker doesn't ping open due to the volume of wool, There is no coming back from an opened maker!
A secret when tying the pom is firstly to wrap the tie around twice, then pull it as tight as it will go. Secondly when knotting the tie, wrap it twice again, as in this picture.
As the tie is already pulled tight this double knot along with the double wrap around will hold it in place without loosening. Pull this double knot tight, and knot once again to hold it all in place.
Before starting to trim, hold the ties out of the way by laying them in the groove of the maker, holding them at the bottom so they're not near the cut.
At this point, if the tie does get cut simply add a new one.
If a tie gets cut once the pom is off the maker, use a darning needle to thread a length of yarn and thread it around the existing ties at the centre.
The wool should be shorter at the front and slightly longer at the centre, with a smooth even finish
Trim the pom by following the curve of the maker with sharp scissors, ensuring to reach into the corners.
After all 4 quarters have been trimmed the pom will look like this. Round, smooth and tuff free.
With small poms like this, only 2 ties are needed, but for the 115 mm (11.5 cm) sized poms 4 ties are a safer bet. Big poms are quite heavy so the extra anchor points will give some security.
When separating the pom from the maker, the hinged ends will show the tie around the middle, don't lose them as once off the machine, the pom will be flattened before the second trim from this part.
With small pom poms there is a risk that the central-wrapped wool could be seen because the pom wool is short and the knot may be chunky, especially if the two ties have been double-wrapped. In this case only double wrap one tie, pulling it extra tight so there is no slack. The second tie would not need to be double-tied if the first is tight enough.
Keeping the pom flat, start trimming, again following the curve of the pom.
From here on in, it is easy to get carried away with trimming, so do a few snips then check, keeping the ties out of the way.
Pinch the wool together for a smoother trim. At this stage just remove missed tuffs to help define the pom's shape.
Look along the horizontal to trim the innermost threads, which eventually will be pulled together, so they need to be the same length.
So far the ties have been kept out of the way, now it is time to create the pom by putting the ties in the right place.
Pinch together the two halves on both sides at the same time (my other hand is taking the photo) and gently twist and pull them slightly, which adjusts the threads around the centre, so the pom becomes spherical hiding the middle.
For the third and final trim, pinch the pom tightly and take off the last few tuffs. It is at this point that over-trimming can be a snip too far!
Once trimmed, roll the pom around like a snowball to fluff and shape it. Hang it at eye level by a tie and gently turn it. It should be a perfect ball, but if the odd bump shows up, very lightly trim off the bump.
Remember to turn it around and hang it from the other tie to check the second half. This just acts as a double check, better to be safe than sorry.
This is the time to neaten the threads around the ties, so holding the ties out of the way lightly shear away for a smooth finish. At this point, any trimming should be a millimetre or so, nothing more.
Here he is, all finished. I offer shaded poms which have a dark and light side, blended in the middle, or speckled ones where each half has the same colours.
There is so much fun to be had with pom pom, and the endless colour options mean there are no bounds as to what can be achieved.
Below are some ideas for pom pom crafts!


You have just read 'Easy Pom Pom Making'
Commentaires